Tuesday, October 2, 2012

Add Multi Tabbed Navigation Widget To Blogger / Blogspot Blogs Sidebar

Add Multi Tabbed Navigation Widget To Blogger / Blogspot Blogs Sidebar:
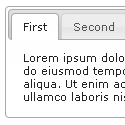
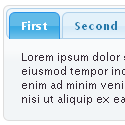
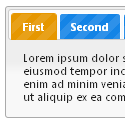
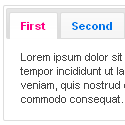
Hi Friends, Today I am going to share how to add multi tabbed widget for blogger. I have seen that there are so many tutorials on the web regarding this. But as I thought these are really complicated.I am writing very easy and simple tutorial which will guide you to add this widget to your blog’s sidebar.It looks very nice in your sidebar. This widget works based on jQuery and jQueryUI.


How to Install This Widget on Blogger?

Steps...

A. Adding Script Code

B. Adding CSS Theme Code

C. Adding HTML Code

Adding Script Code

I have to write two set of instructions for each steps, as some of you are using the default layout, and some of you are using the new layout.Backup your template before attempting this tutorial.

Step 1:

In old layout: Go to Dashboard - Design - Edit HTML - Expand Widget Templates.


In new layout: Go to Dashboard - Template - Edit Template HTML - Expand Widget Templates.


Now find (CTRL+F) this code in the template:

Step 2:And find the code </head>
Step 3: Now add the following code just before the </head> tag.

<script src="http://ajax.googleapis.com/ajax/libs/jquery/1.4/jquery.min.js">
</script>
<script src="http://ajax.googleapis.com/ajax/libs/jqueryui/1.8/jquery-ui.min.js">
</script>
<script>
$(document).ready(function() {
$("#tabs").tabs();
});
</script>


Adding CSS Theme Code
Select One Theme and Place Theme code before </head> tag


<link rel="stylesheet" href="http://ajax.googleapis.com/ajax/libs/jqueryui/1.8.6/themes/base/jquery-ui.css" type="text/css" />


<link rel="stylesheet" href="http://ajax.googleapis.com/ajax/libs/jqueryui/1.8.6/themes/black-tie/jquery-ui.css" type="text/css" />


<link rel="stylesheet" href="http://ajax.googleapis.com/ajax/libs/jqueryui/1.8.6/themes/blitzer/jquery-ui.css" type="text/css" />


<link rel="stylesheet" href="http://ajax.googleapis.com/ajax/libs/jqueryui/1.8.6/themes/dark-hive/jquery-ui.css" type="text/css" />


<link rel="stylesheet" href="http://ajax.googleapis.com/ajax/libs/jqueryui/1.8.6/themes/dot-luv/jquery-ui.css" type="text/css" />


<link rel="stylesheet" href="http://ajax.googleapis.com/ajax/libs/jqueryui/1.8.6/themes/eggplant/jquery-ui.css" type="text/css" />


<link rel="stylesheet" href="http://ajax.googleapis.com/ajax/libs/jqueryui/1.8.6/themes/excite-bike/jquery-ui.css" type="text/css" />


<link rel="stylesheet" href="http://ajax.googleapis.com/ajax/libs/jqueryui/1.8.6/themes/flick/jquery-ui.css" type="text/css" />
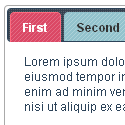


<link rel="stylesheet" href="http://ajax.googleapis.com/ajax/libs/jqueryui/1.8.6/themes/hot-sneaks/jquery-ui.css" type="text/css" />
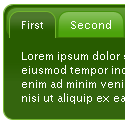


<link rel="stylesheet" href="http://ajax.googleapis.com/ajax/libs/jqueryui/1.8.6/themes/le-frog/jquery-ui.css" type="text/css" />


<link rel="stylesheet" href="http://ajax.googleapis.com/ajax/libs/jqueryui/1.8.6/themes/mint-choc/jquery-ui.css" type="text/css" />
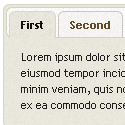


<link rel="stylesheet" href="http://ajax.googleapis.com/ajax/libs/jqueryui/1.8.6/themes/pepper-grinder/jquery-ui.css" type="text/css" />
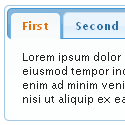


<link rel="stylesheet" href="http://ajax.googleapis.com/ajax/libs/jqueryui/1.8.6/themes/redmond/jquery-ui.css" type="text/css" />


<link rel="stylesheet" href="http://ajax.googleapis.com/ajax/libs/jqueryui/1.8.6/themes/smoothness/jquery-ui.css" type="text/css" />


<link rel="stylesheet" href="http://ajax.googleapis.com/ajax/libs/jqueryui/1.8.6/themes/south-street/jquery-ui.css" type="text/css" />
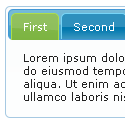


<link rel="stylesheet" href="http://ajax.googleapis.com/ajax/libs/jqueryui/1.8.6/themes/start/jquery-ui.css" type="text/css" />
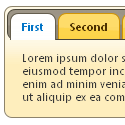


<link rel="stylesheet" href="http://ajax.googleapis.com/ajax/libs/jqueryui/1.8.6/themes/sunny/jquery-ui.css" type="text/css" />
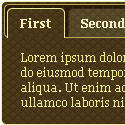


<link rel="stylesheet" href="http://ajax.googleapis.com/ajax/libs/jqueryui/1.8.6/themes/swanky-purse/jquery-ui.css" type="text/css" />


<link rel="stylesheet" href="http://ajax.googleapis.com/ajax/libs/jqueryui/1.8.6/themes/trontastic/jquery-ui.css" type="text/css" />
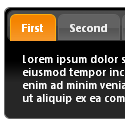


<link rel="stylesheet" href="http://ajax.googleapis.com/ajax/libs/jqueryui/1.8.6/themes/ui-darkness/jquery-ui.css" type="text/css" />


<link rel="stylesheet" href="http://ajax.googleapis.com/ajax/libs/jqueryui/1.8.6/themes/ui-lightness/jquery-ui.css" type="text/css" />
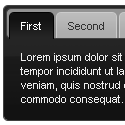


<link rel="stylesheet" href="http://ajax.googleapis.com/ajax/libs/jqueryui/1.8.6/themes/vader/jquery-ui.css" type="text/css" />


Adding HTML Code


I have to write two set of instructions for each steps, as some of you are using the default layout, and some of you are using the new layout. So, let's see how to install this cool widget in your blog..


Step 1:


If you're using the old Blogger interface: Go to Dashboard - Design - Page Elements - Add a Gadget.


Add a Gadget of HTML/JavaScript type.


If you're using the new Blogger interface: Go to Dashboard - Layout - Add a Gadget


2.Click on 'Add a Gadget' on the sidebar.

3.Select 'HTML/Javascript' and add the one of code given below

4. Now Click On Save 'JavaScript' You are done.


<a href="http://24work.blogspot.com" target="_blank" title="Blogger Widgets"><img src="http://safir85.ucoz.com/24work-blogspot/cursor-24work-10.png" border="0" alt="Blogger Widgets" style="position:absolute; top: 0px; right: 0px;" /></a><!-- Tabbed Navigation Widget For Blogger By http://24work.blogspot.com -->
<div id="tabs">
<ul><li><a href="#tabs-1">Tab1</a></li><li><a href="#tabs-2">Tab2</a></li><li><a href="#tabs-3">Tab3</a></li></ul>

<div id="tabs-1">Tab 1 content goes here</div>
<div id="tabs-2">Tab 2 content goes here</div>
<div id="tabs-3">Tab 3 content goes here</div>

<span style="font-size:10px;float:right;margin:5px;font-style:italic;"><a targer="_blank" href="http://24work.blogspot.com">+ Grab this</a></span>
<noscript><span style="font-size:10px;float:right;margin:5px;font-style:italic;"><a targer="_blank" href="http://24work.blogspot.com">+ Grab this</a></span></noscript>
</div>
<!-- Tabbed Navigation Widget For Blogger By http://24work.blogspot.com -->


Note:
Replace these with your tab titles


Tabs-1 , Tabs-2  , Tabs-3

Replace these with your widget codes.

Tab 1 content goes here , Tab 2 content goes here ,  Tab 3 content goes here


Adding HTML Code


Use bellow Form to add HTML widget code to Blogger


Yes! You are Done!


For any assistance and customization of this widget you can surely contact me via comments or Contact form.


Have a Nice Day...


Many thanks to way 2 blogging for making this code and I just tested and modified to work on blogger


How To Add Animated Flash Clock To Your Blogger Blog

How To Add Animated Flash Clock To Your Blogger Blog:
Hello! `How are you guys? here's the cool Clock.this tutorial will show you how to Add animated flash clock gadget your Blogger blog. A clock gives a beautiful look to a website. A clock is a necessity for a personal website, forum, blog etc.Isn’t it exciting when you get a highly quality flash Clock absolutely Free? you can add this flash animated clock your blog easily.i've tested this Flash Clock on internet explorer, mozzilla firefox & many other web browsers. it's very fast and fresh.You simply have to copy the code below each clock and add it to your blog.


Add Animated Flash Clock To Your Blogger blog


I have to write two set of instructions for each steps, as some of you are using the default layout, and some of you are using the new layout. So, let's see how to install this cool widget in your blog..


Step 1:


If you're using the old Blogger interface: Go to Dashboard - Design - Page Elements - Add a Gadget.


Add a Gadget of HTML/JavaScript type.


If you're using the new Blogger interface: Go to Dashboard - Layout - Add a Gadget


2.Click on 'Add a Gadget' on the sidebar.
3.Select 'HTML/Javascript' and add the one of code given below
4. Now Click On Save 'JavaScript' You are done.


How To Add Aniamted Flash Clock Widget To Blogger?

  • Choose a type of clock below
  • Provide Require widget title
  • Fill Height and Width of the Widget
  • Click on "Genetate" button
  • Finally click on "Add to Blogger" to add it to your blog.


Happy blogging!


Special Thanks http://flash-clocks.com

Picture From http://www.2dayblog.com/2009/10/19/manual-digital-clock/


How To Add Snow Effect On The Blogger Mouse Cursor Area

How To Add Snow Effect On The Blogger Mouse Cursor Area:
Hello! `How are you guys? Adding snow effect when you move the mouse cursor will change the look of your blog. here is the effect of fresh snow in your area simple mouse blog. This will make your blog more cold than snow falling from the mouse cursor. Effect is very simple gadget to use. So this is very fast. I tested this effect in Internet Explorer, Mozilla Firefox and many other web browsers. This simple and not flash based image works great! I hope you enjoy using this very cool snow effect gadget. So, let's see how to Add Snow Effect On The Mouse Cursor On The Blog..


make a snow effect on the mouse cursor on the blog


I have to write two set of instructions for each steps, as some of you are using the default layout, and some of you are using the new layout. So, let's see how to install this cool widget in your blog..


Step 1:


If you're using the old Blogger interface: Go to Dashboard - Design - Page Elements - Add a Gadget.


Add a Gadget of HTML/JavaScript type.


If you're using the new Blogger interface: Go to Dashboard - Layout - Add a Gadget


2.Click on 'Add a Gadget' on the sidebar.
3.Select 'HTML/Javascript' and add the one of code given below
4. Now Click On Save 'JavaScript' You are done.


<a href="http://24work.blogspot.com" target="_blank" title="Blogger Widgets"><img src="http://safir85.ucoz.com/24work-blogspot/cursor-24work-10.png" border="0" alt="Blogger Widgets" style="position:absolute; top: 0px; right: 0px;" /></a><script type="text/javascript">
// <![CDATA[
var colour="black";
var sparkles=100;

var x=ox=400;
var y=oy=300;
var swide=800;
var shigh=600;
var sleft=sdown=0;
var tiny=new Array();
var star=new Array();
var starv=new Array();
var starx=new Array();
var stary=new Array();
var tinyx=new Array();
var tinyy=new Array();
var tinyv=new Array();
window.onload=function() { if (document.getElementById) {
var i, rats, rlef, rdow;
for (var i=0; i<sparkles; i++) {
var rats=createDiv(3, 3);
rats.style.visibility="hidden";
document.body.appendChild(tiny[i]=rats);
starv[i]=0;
tinyv[i]=0;
var rats=createDiv(5, 5);
rats.style.backgroundColor="transparent";
rats.style.visibility="hidden";
var rlef=createDiv(1, 5);
var rdow=createDiv(5, 1);
rats.appendChild(rlef);
rats.appendChild(rdow);
rlef.style.top="3px";
rlef.style.left="0px";
rdow.style.top="0px";
rdow.style.left="3px";
document.body.appendChild(star[i]=rats);
}
set_width();
sparkle();
}}
function sparkle() {
var c;
if (x!=ox || y!=oy) {
ox=x;
oy=y;
for (c=0; c<sparkles; c++) if (!starv[c]) {
star[c].style.left=(starx[c]=x)+"px";

star[c].style.top=(stary[c]=y)+"px";
star[c].style.clip="rect(0px, 5px, 5px, 0px)";
star[c].style.visibility="visible";
starv[c]=50;
break;
}
}
for (c=0; c<sparkles; c++) {
if (starv[c]) update_star(c);
if (tinyv[c]) update_tiny(c);
}
setTimeout("sparkle()", 40);
}
function update_star(i) {
if (--starv[i]==25) star[i].style.clip="rect(1px, 4px, 4px, 1px)";
if (starv[i]) {
stary[i]+=1+Math.random()*3;
if (stary[i]<shigh+sdown) {
star[i].style.top=stary[i]+"px";
starx[i]+=(i%5-2)/5;
star[i].style.left=starx[i]+"px";
}
else {
star[i].style.visibility="hidden";
starv[i]=0;
return;
}

}
else {
tinyv[i]=50;
tiny[i].style.top=(tinyy[i]=stary[i])+"px";
tiny[i].style.left=(tinyx[i]=starx[i])+"px";
tiny[i].style.width="2px";
tiny[i].style.height="2px";
star[i].style.visibility="hidden";
tiny[i].style.visibility="visible"
}
}
function update_tiny(i) {
if (--tinyv[i]==25) {
tiny[i].style.width="1px";
tiny[i].style.height="1px";
}
if (tinyv[i]) {
tinyy[i]+=1+Math.random()*3;
if (tinyy[i]<shigh+sdown) {
tiny[i].style.top=tinyy[i]+"px";
tinyx[i]+=(i%5-2)/5;
tiny[i].style.left=tinyx[i]+"px";
}
else {


tiny[i].style.visibility="hidden";
tinyv[i]=0;
return;
}
}
else tiny[i].style.visibility="hidden";
}
document.onmousemove=mouse;
function mouse(e) {
set_scroll();
y=(e)?e.pageY:event.y+sdown;
x=(e)?e.pageX:event.x+sleft;
}
function set_scroll() {
if (typeof(self.pageYOffset)=="number") {
sdown=self.pageYOffset;
sleft=self.pageXOffset;
}
else if (document.body.scrollTop || document.body.scrollLeft) {
sdown=document.body.scrollTop;
sleft=document.body.scrollLeft;
}
else if (document.documentElement && (document.documentElement.scrollTop || document.documentElement.scrollLeft)) {
sleft=document.documentElement.scrollLeft;
sdown=document.documentElement.scrollTop;
}
else {
sdown=0;
sleft=0;
}
}
window.onresize=set_width;
function set_width() {
if (typeof(self.innerWidth)=="number") {
swide=self.innerWidth;
shigh=self.innerHeight;
}
else if (document.documentElement && document.documentElement.clientWidth) {
swide=document.documentElement.clientWidth;
shigh=document.documentElement.clientHeight;
}
else if (document.body.clientWidth) {
swide=document.body.clientWidth;
shigh=document.body.clientHeight;
}
}
function createDiv(height, width) {
var div=document.createElement("div");
div.style.position="absolute";
div.style.height=height+"px";
div.style.width=width+"px";
div.style.overflow="hidden";
div.style.backgroundColor=colour;
return (div);
}
// ]]>
</script>


And now click Save


# you can change :


var colour="black";


Hex Color Code Chart & Generator 


Html Color Codes Generator 


That’s All!
Hope you have enjoyed the post.

Random Posts Widget for Blogger / Blogspot With Summaries

Random Posts Widget for Blogger / Blogspot With Summaries:
Random Posts Widget For Blogger is great widget. Posts Widget for Blogger is random most popular flash which is useful to increase traffic. make the visitor stay on your site longer and to increase page views posts.Each time updates page of your blog posts widget random change. It can be shown in the sidebar of your blog with or without thumnails.Really this is the jewel of the flash really should show up on his blog.


How to Install this Widget


I have to write two set of instructions for each steps, as some of you are using the default layout, and some of you are using the new layout. So, let's see how to install this cool widget in your blog..

Step 1:
If you're using the old Blogger interface: Go to Dashboard - Design - Page Elements - Add a Gadget.


Add a Gadget of HTML/JavaScript type.


If you're using the new Blogger interface: Go to Dashboard - Layout - Add a Gadget


2.Click on 'Add a Gadget' on the sidebar.

3.Select 'HTML/Javascript' and add the one of code given below

4. Now Click On Save 'JavaScript' You are done.


<a href="http://24work.blogspot.com" target="_blank" title="Blogger Widgets"><img src="http://safir85.ucoz.com/24work-blogspot/cursor-24work-10.png" border="0" alt="Blogger Widgets" style="position:absolute; top: 0px; right: 0px;" /></a><script type="text/javascript">
var randarray = new Array();var l=0;var flag;
var numofpost=5;function randomposts(json){
var total = parseInt(json.feed.openSearch$totalResults.$t,10);
for(i=0;i < numofpost;){flag=0;randarray.length=numofpost;l=Math.floor(Math.random()*total);for(j in randarray){if(l==randarray[j]){ flag=1;}}
if(flag==0&&l!=0){randarray[i++]=l;}}document.write('<ul>');
for(n in randarray){ var p=randarray[n];var entry=json.feed.entry[p-1];
for(k=0; k < entry.link.length; k++){if(entry.link[k].rel=='alternate'){var item = "<li>" + "<a href=" + entry.link[k].href + ">" + entry.title.$t + "</a> </li>";
document.write(item);}}
}document.write('</ul>');}
</script>
<script type='text/javascript' src='/feeds/posts/default?alt=json-in-script&start-index=1&max-results=1000&callback=randomposts'></script>
<a href='http://24work.blogspot.com'><img style='border: 0px' src='https://sites.google.com/site/bdlab12/24work/blogspot%2btutorial.png'/></a><noscript><a href="http://24work.blogspot.com">+ RandomPostsWidgetForBlogger</a></noscript>


And now click Save


Change the the text no in red above in codes to select how many random posts you want to display.


Random Posts widget Generator


1. Change the title of the widget if you want.

2. Change the number of posts links you want to display.

3. Click the “Customize” generate button to make the changes take effect, then click on the “Add to Blog” button.


Random Posts With Summaries Widget


summary to the random posts widget.
Preview:


<a href="http://24work.blogspot.com" target="_blank" title="Blogger Widgets"><img src="http://safir85.ucoz.com/24work-blogspot/cursor-24work-10.png" border="0" alt="Blogger Widgets" style="position:absolute; top: 0px; right: 0px;" /></a><script type="text/javascript">
var randarray = new Array();var l=0;var flag;
var numofpost=5;var wordnumber=10;</script>
<script style ='text/javascript' src='http://bdlab.googlecode.com/files/randomposts_24work-2.js'>
</script>
<script type='text/javascript' src='/feeds/posts/default?alt=json-in-script&start-index=1&max-results=1000&callback=randomposts'></script>
<a href='http://24work.blogspot.com'><img style='border: 0px' src='https://sites.google.com/site/bdlab12/24work/blogspot%2btutorial.png'/></a><noscript><a href="http://24work.blogspot.com">+ RandomPostsWidgetForBlogger</a></noscript>


And now click Save


Change the the text no in red above in codes to select how many random posts you want to display.and Change the blue number of words you want to include in the summary to display.


Random Posts With Summaries Widget Generator

1. Change the title of the widget if you want.

2. Change the number of posts links you want to display.

3. Change the number of words you want to include in the summary to display.

3. Click the “Customize” button to make the changes take effect, then click on the “Add to Blog” button.


Those are all the steps necessary to implement the Random Post Widget to blogger. I hope you and your readers thoroughly enjoy it!


Many thanks to bloggodown for making this code and I just tested and modified to work on blogger


Animated Recent posts for Blogger / Blogspot with thumbnails - Simple Spy

Animated Recent posts for Blogger / Blogspot with thumbnails - Simple Spy:
Animated recent post is a fantastic way to present headlines updates to your readers.The effect of smooth scrolling attract readers and generate more clicks to your site.This gadget displays your most recent posts and includes a small thumbnail, but has the added bonus of using an animated effect that moves smoothly through the posts.There are a lot of great tutorials discussing on how to add Animated Recent posts for blogger with thumbnails and Simple Spy, but most of the tutorials I've found are not really suitable for a beginner.


How to Install Animated Recent posts for blogger with thumbnails and Simple Spy


I have to write two set of instructions for each steps, as some of you are using the default layout, and some of you are using the new layout. So, let's see how to install this cool widget in your blog..

Step 1:

If you're using the old Blogger interface: Go to Dashboard - Design - Page Elements - Add a Gadget.


Add a Gadget of HTML/JavaScript type.


If you're using the new Blogger interface: Go to Dashboard - Layout - Add a Gadget


2.Click on 'Add a Gadget' on the sidebar.

3.Select 'HTML/Javascript' and add the one of code given below

4. Now Click On Save 'JavaScript' You are done.

Note - If you have previously added jQuery to your blog you can remove the line at the top in red.

<a href="http://24work.blogspot.com" target="_blank" title="Blogger Widgets"><img src="http://safir85.ucoz.com/24work-blogspot/cursor-24work-10.png" border="0" alt="Blogger Widgets" style="position:absolute; top: 0px; right: 0px;" /></a><script src="http://ajax.googleapis.com/ajax/libs/jquery/1.3.2/jquery.min.js" type="text/javascript"></script>

<style type="text/css" media="screen">

<!--


#spylist {

overflow:hidden;

margin-top:5px;

padding:0px 0px;

height:350px;

}

#spylist ul{

width:220px;

overflow:hidden;

list-style-type: none;

padding: 0px 0px;

margin:0px 0px;

}

#spylist li {

width:208px;

padding: 5px 5px;

margin:0px 0px 5px 0px;

list-style-type:none;

float:none;

height:70px;

overflow: hidden;

background:#fff url(https://blogger.googleusercontent.com/img/b/R29vZ2xl/AVvXsEgRisGN1xI0V3cGZXdHo_s1K4BFKi6WeJz0j3OWxri7EPdLHrXtKvICyIweENns32j4n_KCmCI9vLbm2wCcirhCsrmV3Fa0UR1X0gvicmFVcsULI80ns0tNNpPCPwyDH8jIa4uPGcyK0SYg/s1600/bdlab-blogspot-com.jpg) repeat-x;

border:1px solid #ddd;

}


#spylist li a {

text-decoration:none;

color:#4B545B;

font-size:11px;

height:18px;

overflow:hidden;

margin:0px 0px;

padding:0px 0px 2px 0px;

}

#spylist li img {

float:left;

margin-right:5px;

background:#EFEFEF;

border:0;

}

.spydate{

overflow:hidden;

font-size:10px;

color:#0284C2;

padding:2px 0px;

margin:1px 0px 0px 0px;

height:15px;

font-family:Tahoma,Arial,verdana, sans-serif;

}


.spycomment{

overflow:hidden;

font-family:Tahoma,Arial,verdana, sans-serif;

font-size:10px;

color:#262B2F;

padding:0px 0px;

margin:0px 0px;

}


-->

</style>


<script language='JavaScript'>


imgr = new Array();


imgr[0] = "https://blogger.googleusercontent.com/img/b/R29vZ2xl/AVvXsEjNquYrOMuqeSZVn-qwVeCmbQrxQSetg6FTjdh5LSccXznbMiag0sBe4zogEqDZiXfBzs0ImSpu2F8J8YxySKgsA6pw6uOXoHnkUZAapunhXKYJthCGMFPEMdxp1YT4UXPxy19X1d9r6EY/s400/noimage.png";


imgr[1] = "https://blogger.googleusercontent.com/img/b/R29vZ2xl/AVvXsEjNquYrOMuqeSZVn-qwVeCmbQrxQSetg6FTjdh5LSccXznbMiag0sBe4zogEqDZiXfBzs0ImSpu2F8J8YxySKgsA6pw6uOXoHnkUZAapunhXKYJthCGMFPEMdxp1YT4UXPxy19X1d9r6EY/s400/noimage.png";


imgr[2] = "https://blogger.googleusercontent.com/img/b/R29vZ2xl/AVvXsEjNquYrOMuqeSZVn-qwVeCmbQrxQSetg6FTjdh5LSccXznbMiag0sBe4zogEqDZiXfBzs0ImSpu2F8J8YxySKgsA6pw6uOXoHnkUZAapunhXKYJthCGMFPEMdxp1YT4UXPxy19X1d9r6EY/s400/noimage.png";


imgr[3] = "https://blogger.googleusercontent.com/img/b/R29vZ2xl/AVvXsEjNquYrOMuqeSZVn-qwVeCmbQrxQSetg6FTjdh5LSccXznbMiag0sBe4zogEqDZiXfBzs0ImSpu2F8J8YxySKgsA6pw6uOXoHnkUZAapunhXKYJthCGMFPEMdxp1YT4UXPxy19X1d9r6EY/s400/noimage.png";


imgr[4] = "https://blogger.googleusercontent.com/img/b/R29vZ2xl/AVvXsEjNquYrOMuqeSZVn-qwVeCmbQrxQSetg6FTjdh5LSccXznbMiag0sBe4zogEqDZiXfBzs0ImSpu2F8J8YxySKgsA6pw6uOXoHnkUZAapunhXKYJthCGMFPEMdxp1YT4UXPxy19X1d9r6EY/s400/noimage.png";

showRandomImg = true;


boxwidth = 255;


cellspacing = 6;


borderColor = "#232c35";


bgTD = "#000000";


thumbwidth = 70;


thumbheight = 70;


fntsize = 12;


acolor = "#666";


aBold = true;


icon = " ";


text = "comments";


showPostDate = true;


summaryPost = 40;


summaryFontsize = 10;


summaryColor = "#666";


icon2 = " ";


numposts = 10;


home_page = "http://bdlab.blogspot.com/";


limitspy=4

intervalspy=4000

</script>

<div id="spylist">

<script src='http://safir85.ucoz.com/bdlab-blogspot/24work/recent-posts/animated_recent_posts.js' type='text/javascript'></script>

</div>


And now click Save


Note :If your template already have a jquery do not put again, just copy after it
Html from above a few things could be replaced :

<script src="http://ajax.googleapis.com/ajax/libs/jquery/1.3.2/jquery.min.js" type="text/javascript"></script>


1. homepage address
home_page = “http://bdlab.blogspot.com/”;

2. Style

from above style/css, you can change :

width : 220px;
width:208px:

customize base on your template
and
background:#fff url(http://dl.getdropbox.com/u/708209/scriptabufarhan/recentspy/post.jpg) repeat-x;
or background:#fff url(https://blogger.googleusercontent.com/img/b/R29vZ2xl/AVvXsEgRisGN1xI0V3cGZXdHo_s1K4BFKi6WeJz0j3OWxri7EPdLHrXtKvICyIweENns32j4n_KCmCI9vLbm2wCcirhCsrmV3Fa0UR1X0gvicmFVcsULI80ns0tNNpPCPwyDH8jIa4uPGcyK0SYg/s1600/bdlab-blogspot-com.jpg) repeat-x;

Customize the colors of backuground

3. image size
thumbwidth = 70;
thumbheight = 70;

Match your needs

4. How many post you will show
numposts = 10;

Base on what you need to show


Many thanks to abu-farhan for making this code and I just tested and modified to work on blogger